Between battling with ice and snow, a bit of RSI on my arms (fingers, wrists, elbows... argh!), I got two hats and a pair of mittens to their giftees.
I used Knitty patterns for the hat and mitten set : Center Square hat and Matrix mittens. I thought these two patterns went well together and had a lot of fun doing the Fair Isle type knitting. I used Crimson and Grey colors for my Washington State University Cougar daughter. Sorry, I didn't get photos before she wore them off to the frigid reaches of Eastern Washington.
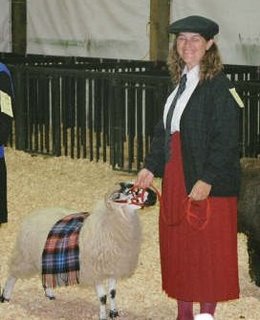
The second hat showcases some of my handspun yarn. It's a gathering of Lonie, our recently departed GSD, undercoat and blended with some relatively soft English Leicester wool. This was my first dog spinning, and it was a prize winner! For several years, the yarn sat around waiting for the perfect project. There wasn't much - just a skein.
So, I designed a simple hat to fit the yarn. The hat is very warm - bulky yarn, chiengora, and ribbed construction - combined to make a hat quite suitable for our current frigid weather! I like to start hats at the top, especially with a limited amount of yarn available...

...and I try to use a smaller diameter edge, as wool hats seem to have limited elasticity, and like to stretch out of shape.

It's a stocking type hat, I believe they're called "beanies" these days, and the bulk of the hat is K1, P1 rib, with the edgeband knit on smaller needles in K2, P2 rib.
So here's the pattern:
Yarn - bulky handspun. My hat weighs 2.7 ounces.
Needles - Sizes 10 and 8 (to fit the yarn - larger should make a nice supple fabric, the smaller will make a fabric that feels a little tight) - double pointed, two circulars, or one long circular, your preference
Gauge - not critical; starting from the top, you can measure for gauge after several inches, plus try on the hat if you use circular needles.
Cast on 8 stitches using a circular cast on.
I like a version of Emily Ocker's circular cast on. In my version (that I "unvented" several years before reading about other versions), I simulate the cast off for a circular thumb, hat, mitten by making a double circle with the yarn, then picking up stitches around the circle, as in a provisional cast on. Make the double circle big enough you can cast on all of your stitches along one side. Scruntch the stitches (watch out for twist!) and knit one row like an I cord (knit starting at the first cast on stitch, pulling the yarn between the last cast on stitch and the first knit stitch tight).
After your first row, you can put half the stitches onto the second needle and tighten up the circle. If you want, you can divide the stitches onto two needles before knitting the first row. It's a little more fiddly for me that way, so I like the I cord type solution.
If you use the EO version, don't knit one row after transferring stitches to the needles, start right in with Row 2.
Row 2 - Knit front and back in each stitch - 16 stitches, 8 on each needle.
Row 3 - K1, P1 around
Row 4 - K1f&b, P1 - repeat 8 times - around - 24 sts.
Row 5 - K1, P2 around (repeated 8 times)
Row 6 - K1f&b, K1, P1 around (repeated 8 times) - 32 sts.
Rows 3 through 6 repeat, with 8 increases every other row until there is enough hat to go around the intended's head. I designed in about 2" of negative ease - about 20" around for a 22" circumference head.
Here's how my hat increased:
Row 7 - K1, P1 around
Row 8 - K1f&b, P1, K1, P1 around (repeated 8 times) - 40 sts.
Row 9 - K1, P2, K1, P1 around (repeated 8 times)
Row 10 - K1f&b, K1, P1, K1, P1 around (repeated 8 times) - 48 sts.
Row 11 - K1, P1 around
Row 12 - K1f&b, P1, K1, P1, K1, P1 around (repeated 8 times) - 56 sts.
Row 13 - K1, P2, K1, P1, K1, P1 around (repeated 8 times)
Row 14 - K1f&b, K1, P1, K1, P1, K1, P1 around (repeated 8 times) - 64 sts.
Row 15 - K1, P1 around
Row 16 - K1f&b, P1, K1, P1, K1, P1, K1, P1 around (repeated 8 times) - 72 sts.
Row 17 - K1, P2, K1, P1, K1, P1, K1, P1 around (repeated 8 times)
Row 18 - K1f&b, K1, P1, K1, P1, K1, P1, K1, P1 around (repeated 8 times) - 80 sts.
Row 19 - K1, P1 around
Row 20 - K1f&b, P1, K1, P1, K1, P1, K1, P1 around (repeated 8 times) - 88 sts.
Row 21 - K1, P2, (K1, P1) 4x around (repeated 8 times)
Row 22 - K1f&b, (K1, P1) 4x around (repeated 8 times) - 96 sts.
You now have plenty of stitches to check your gauge. 96 was enough for my hat.
Rows 23+ - Continue in K1, P1 pattern until hat measures about 7 inches, or 1.5" to 2" short of desired length.
Edge band - Switch to smaller needles and change pattern to K2, P2 ribbing. Knit until hat is desired length.
Cast off - Using one of the larger needles as the working needle, cast off in K1, P2 pattern. Weave in loose ends. Block (or not) and Enjoy!
- Franna

5 comments:
We stayed up WAY too late last night watching "chick flicks" and now my brain is too tired to try to wrap around circular cast-on, which I have never heard of before. Will have to revist, but nice hat!
We stayed up WAY too late last night watching "chick flicks" and now my brain is too tired to try to wrap around circular cast-on, which I have never heard of before. Will have to revist, but nice hat!
Ooooo, chick flicks! We've had on the Santa Clause trilogy, Harry Potter, and the Polar Express. Fun moovies.
Once you wrap your brain around circular cast ons, you won't look back! It's so much more efficient, and cast off for a hat doesn't have to be really loose - actually, I like a tighter cast off. It helps keep the edge from stretching. WHEN you start knitting socks (insert encouraging dialog ;-) toe up is also so much more efficient - and you can try those on as you go, too.
- Franna
Hat and model are very handsome - like the juxtaposition of sir dog in the corner :-)
Ours is melting away - hope yours is too. T.
What a lovely way to remember and keep Lonnie close now.
Post a Comment